Let me show you how to edit videos.
The internet landscape has become so video-focused, having an understanding of video editing is essential. Of course, you don’t have to be an editing wizard, but it’s a nice skill to have under your belt.
Whether it’s for work, for social media, or your compiling clips from your latest vacation, there’s no shortage of reasons why one may want to edit a video. Thankfully, there are so many pieces of software available.
How to edit videos
Mashable can’t help but recommend Adobe Premiere, which is the standard among many professionals.
Not only is it intuitive for those dipping their feet into video editing, but it also has a wide array of toolsets.
Step 1: Open Adobe Premiere. Import your video clips by selecting File at the top menu bar. Next, click Import and choose the clips you’d like to use.
Step 2: Drag-and-drop one clip at a time into the Main Sequence bar in the bottom center of your screen.
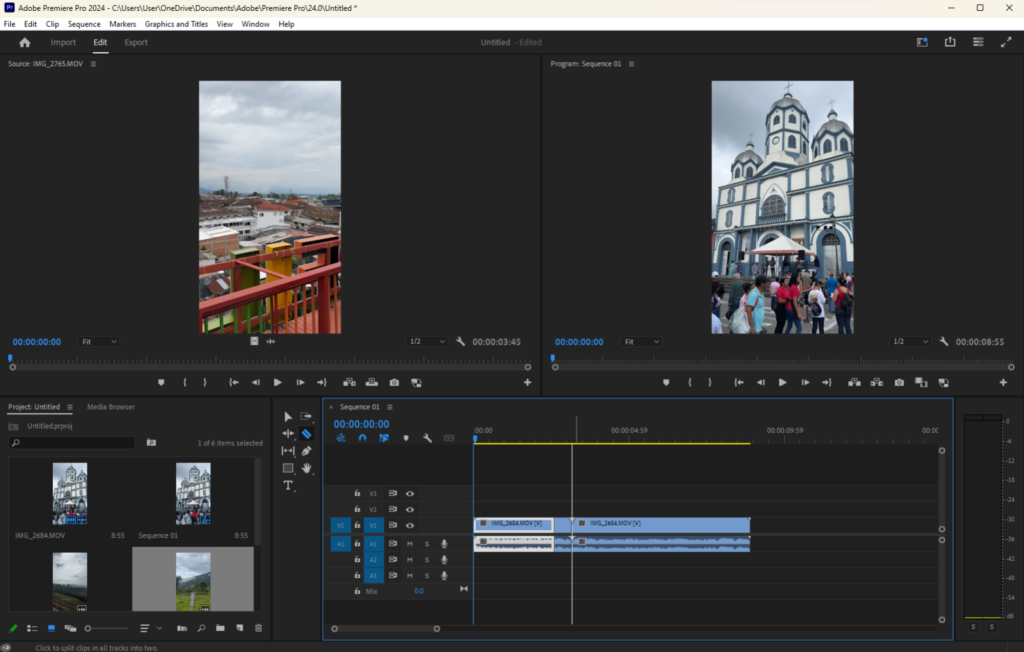
Step 3: To edit and refine each video clip, click on the Razer Tool (or C key). Use the playhead at the top of the Main Sequence bar to find the start and ending moments of your clip. Select each one individually.

Credit: Steve Vegvari
Hit the Selection Tool (or V key) and use your mouse to select each unwanted clip and hit the Delete button on your keyboard.
Step 4: To add new audio or music, import the audio files by dragging them into the Project panel. You can then add each one onto the Main Sequence and assort them accordingly.
You can also mute the original audio from the video clips by clicking the ‘M’ symbol on the original audio track in the Main Sequence (likely designated as Audio 1).
Step 5: Rearrange and organize your clips and audio by dragging each clip in the Main Sequence.

Credit: Steve Vegvari
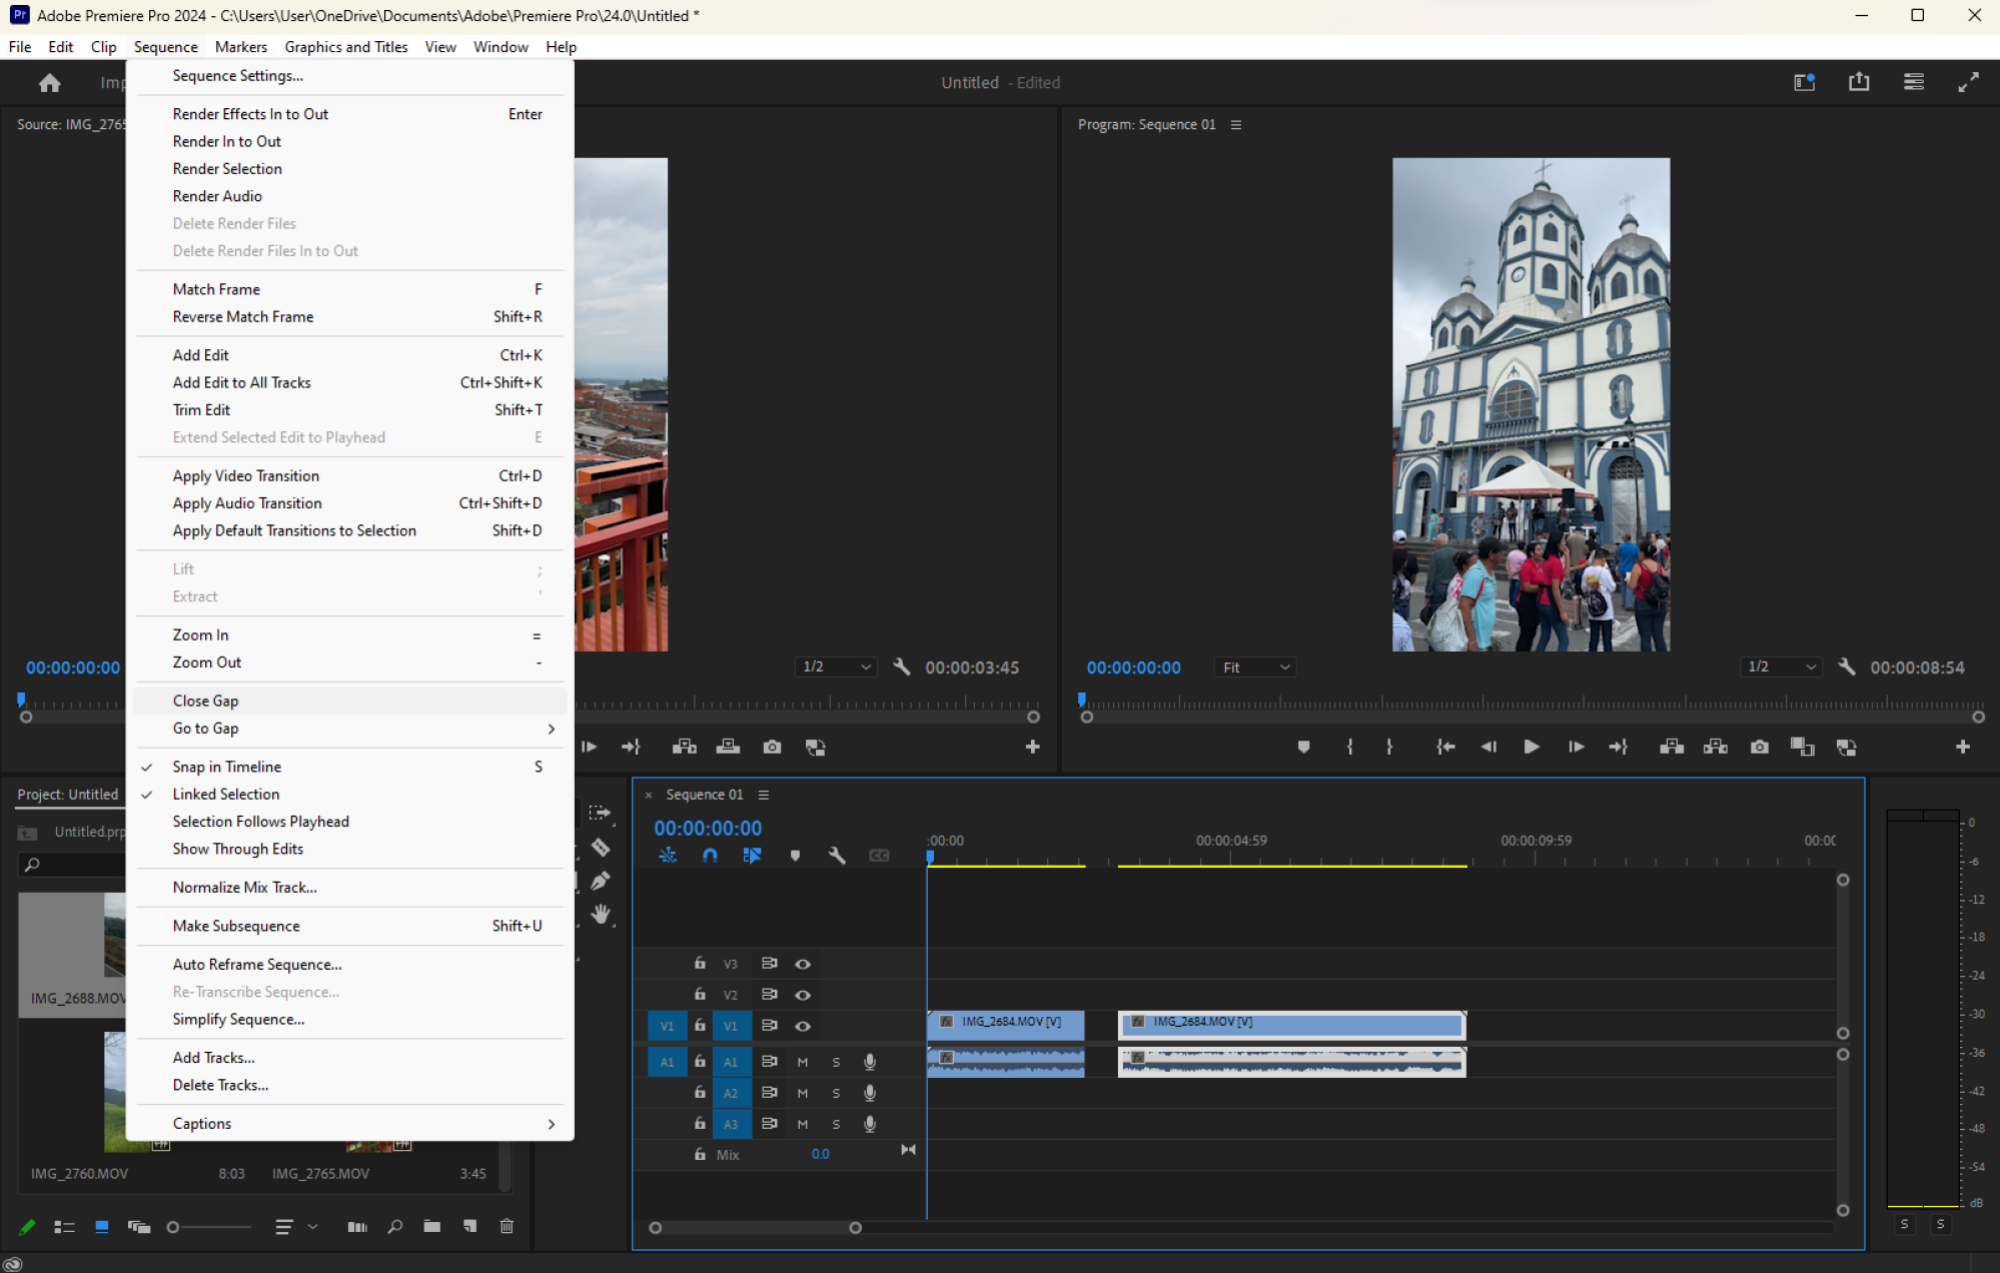
Once you are done, head to Sequence in the top menu bar and select Close Gap to remove any gaps in your timeline.
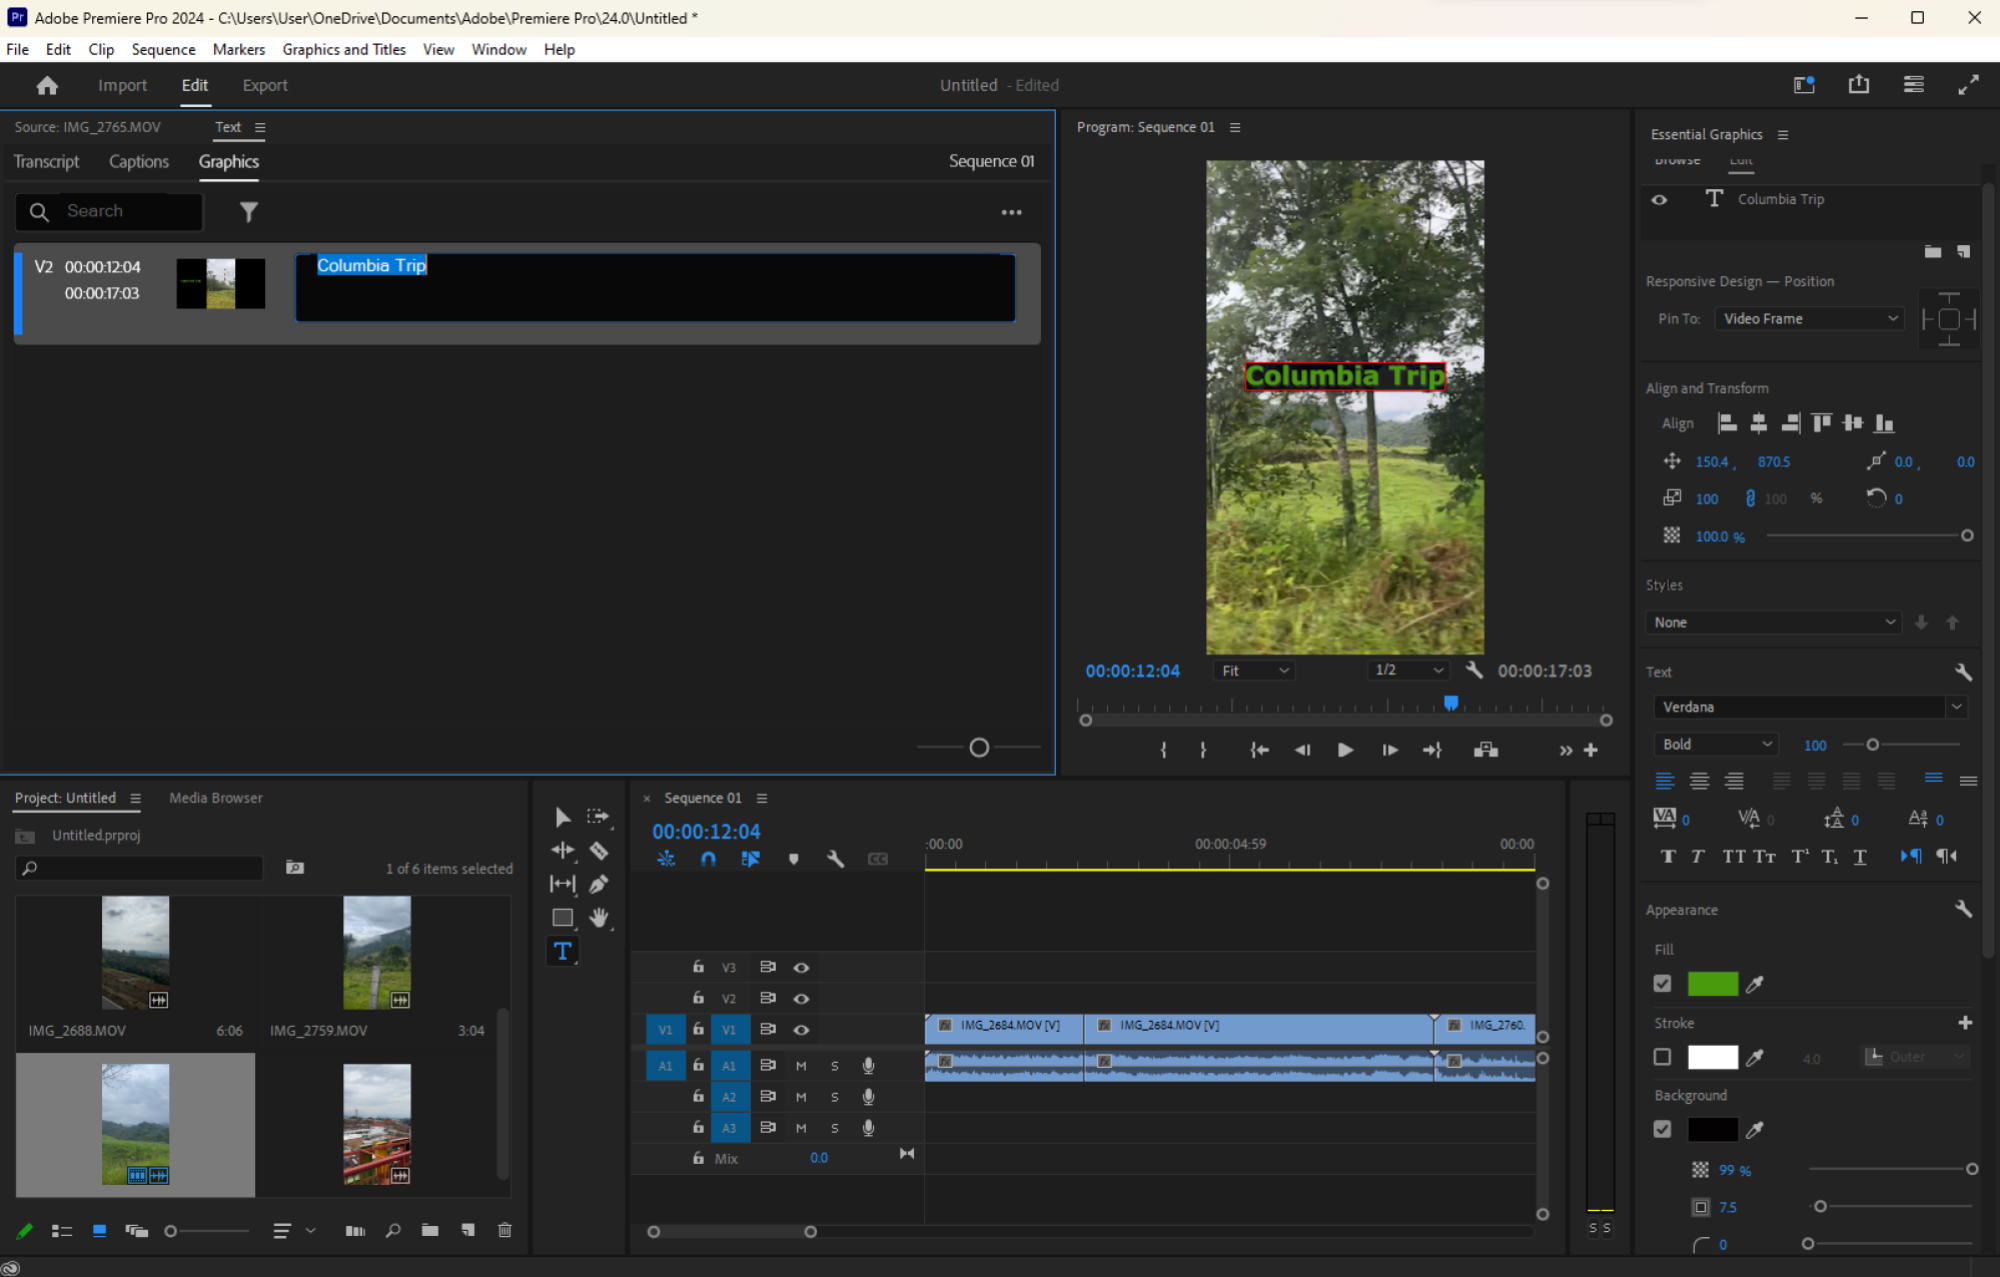
Step 6: If you’d like to add a title or onscreen text, hit the Text tool (or CRTL + T key). Then clip on the Program monitor above. Begin typing the text you wish to use.

Credit: Steve Vegvari
Adjust how long you’d like the text to stay on screen by adjusting its clip duration on the timeline.
Use the Effects Control panel on the top left-hand side to adjust font, sizing, positioning, etc.
Step 7: Use your mouse to highlight all the clips from beginning to end on the Main Sequence. Navigate to ‘File in the top menu and Export.
Select Media and name the file. Choose its export destination and format. In most cases, YouTube 1080p Full HD is a good preset to choose because it will be compatible with many platforms.
From there, you can take your clip and use it as you see fit. Upload it to YouTube, show it off on TikTok, share it on Instagram, or throw it in a Google Drive.


